Tutorial 3: Logging In to the EnOS Console with Enterprise Accounts - OIDC
The built-in Eniot client in the SSO Server and the ID broker function are used to log in to the remote authentication source, such as AAD, ADFS, GITLAB, and KC, where the enterprise account is located.
In this tutorial, the Azure Active Directory is taken as an example to log in to the SSO Server in compliance with the OIDC protocol.
Prerequisites
- You have an EnOS system administrator account and have all operation permissions for Single Sign-On. For more information, see Policies, Roles and Permissions.
- You have an EnOS OU administrator account, and have been authorized by the system administrator with the operation permissions for Single Sign-On. For more information, see Policies, Roles and Permissions.
Procedure
Step 1: Configure the Client for SSO Server on the Azure Active Directory (AAD)
Log in to the Azure portal, and enable the Azure Active Directory service.
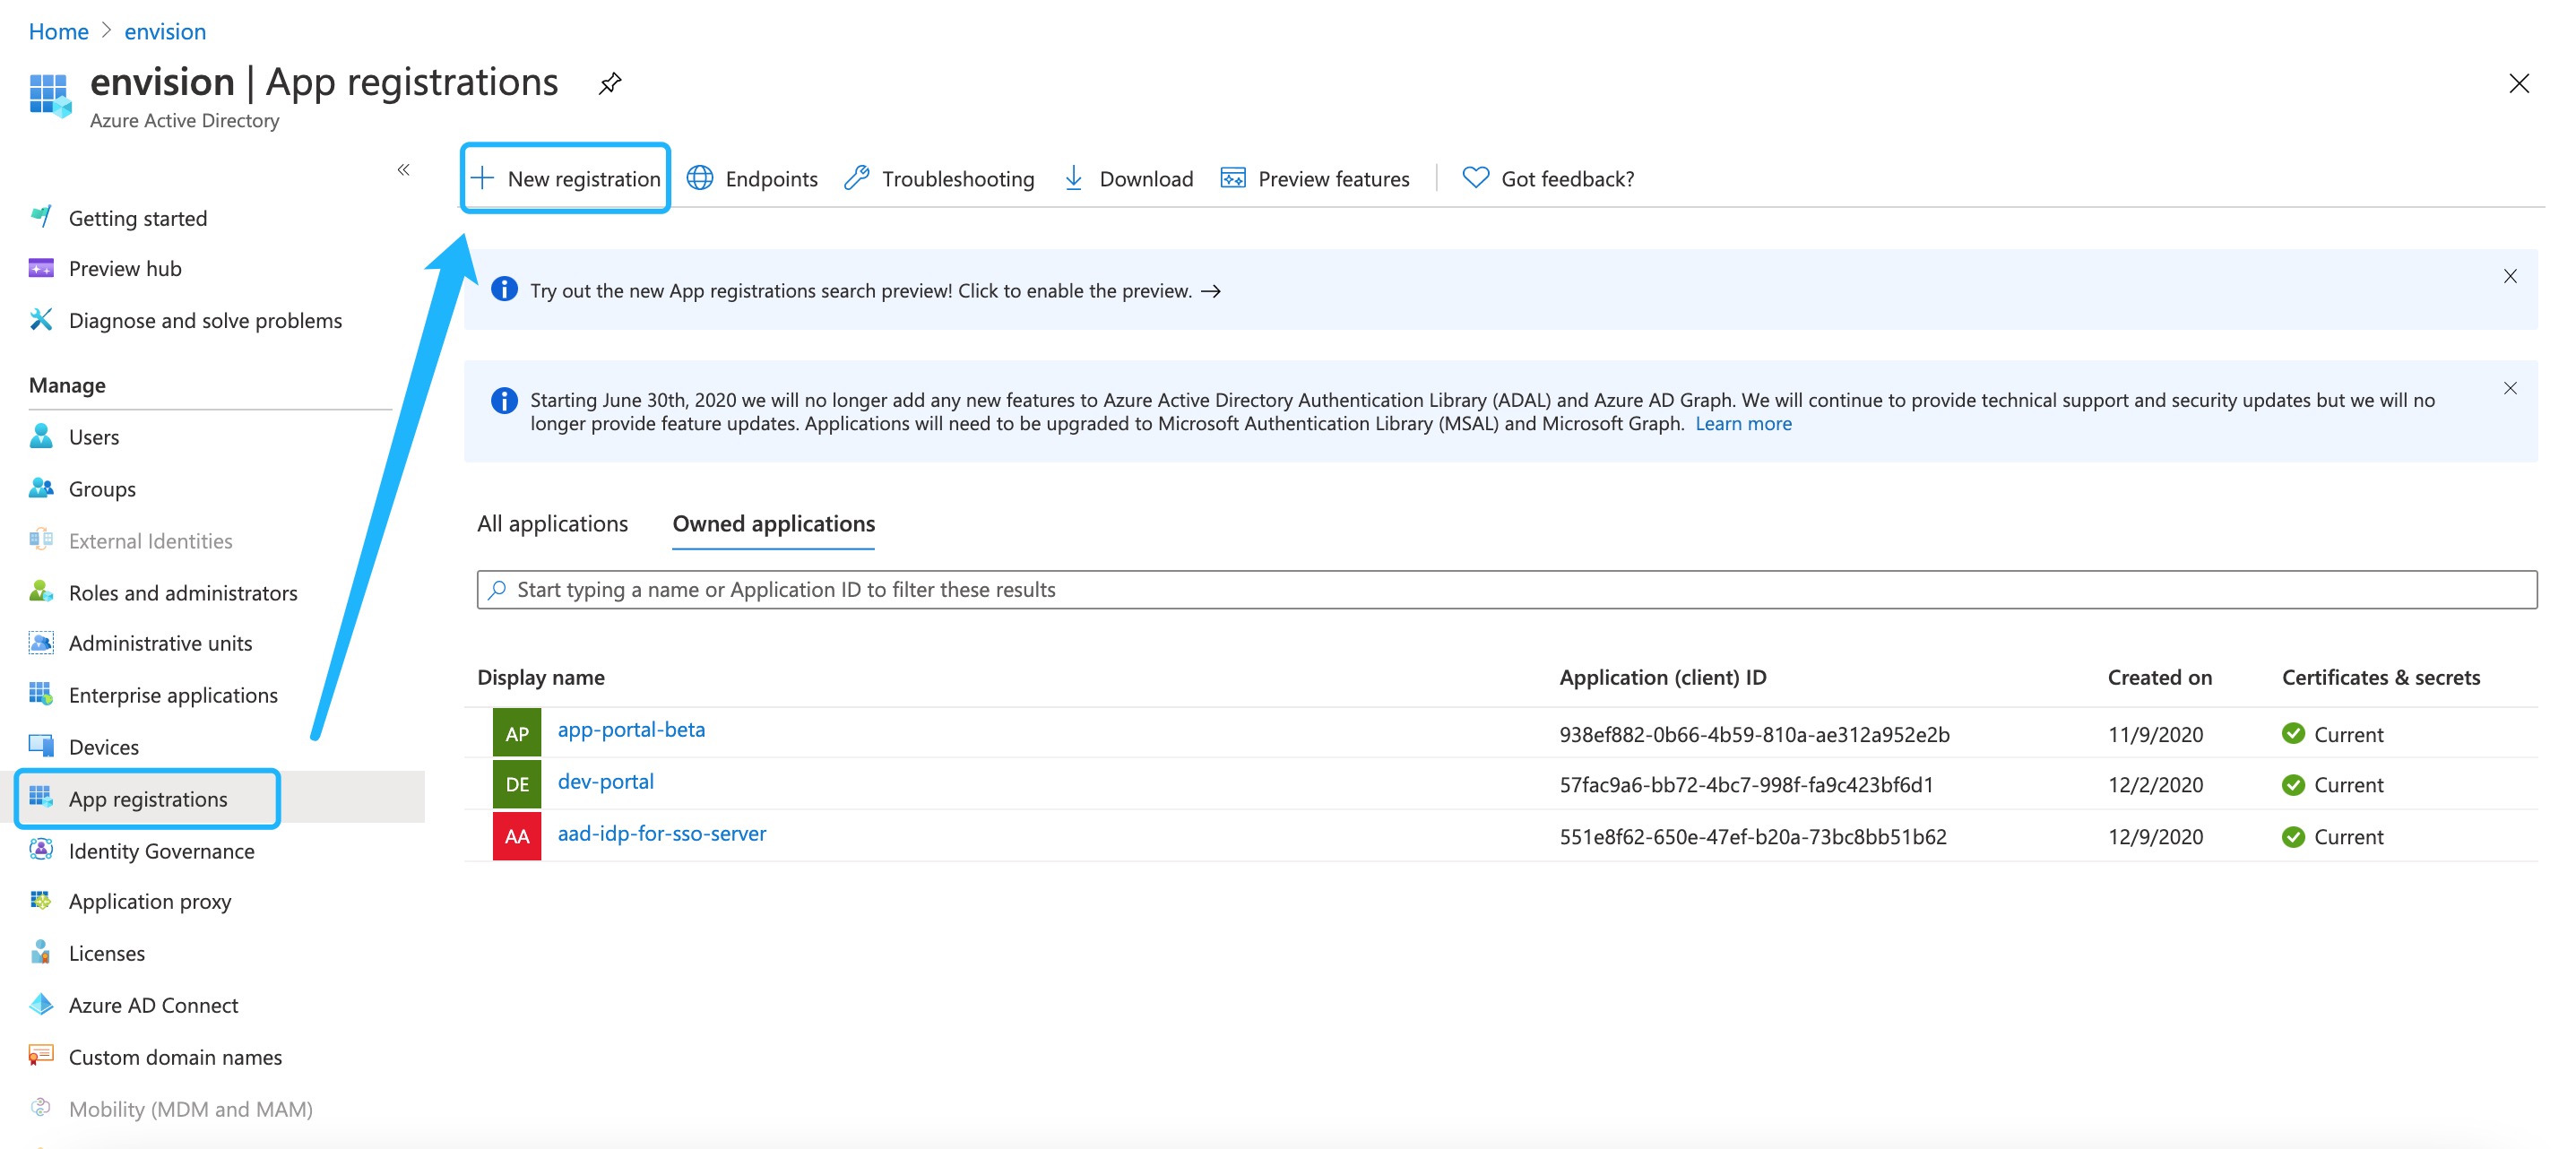
Select App registrations, and click New registration.
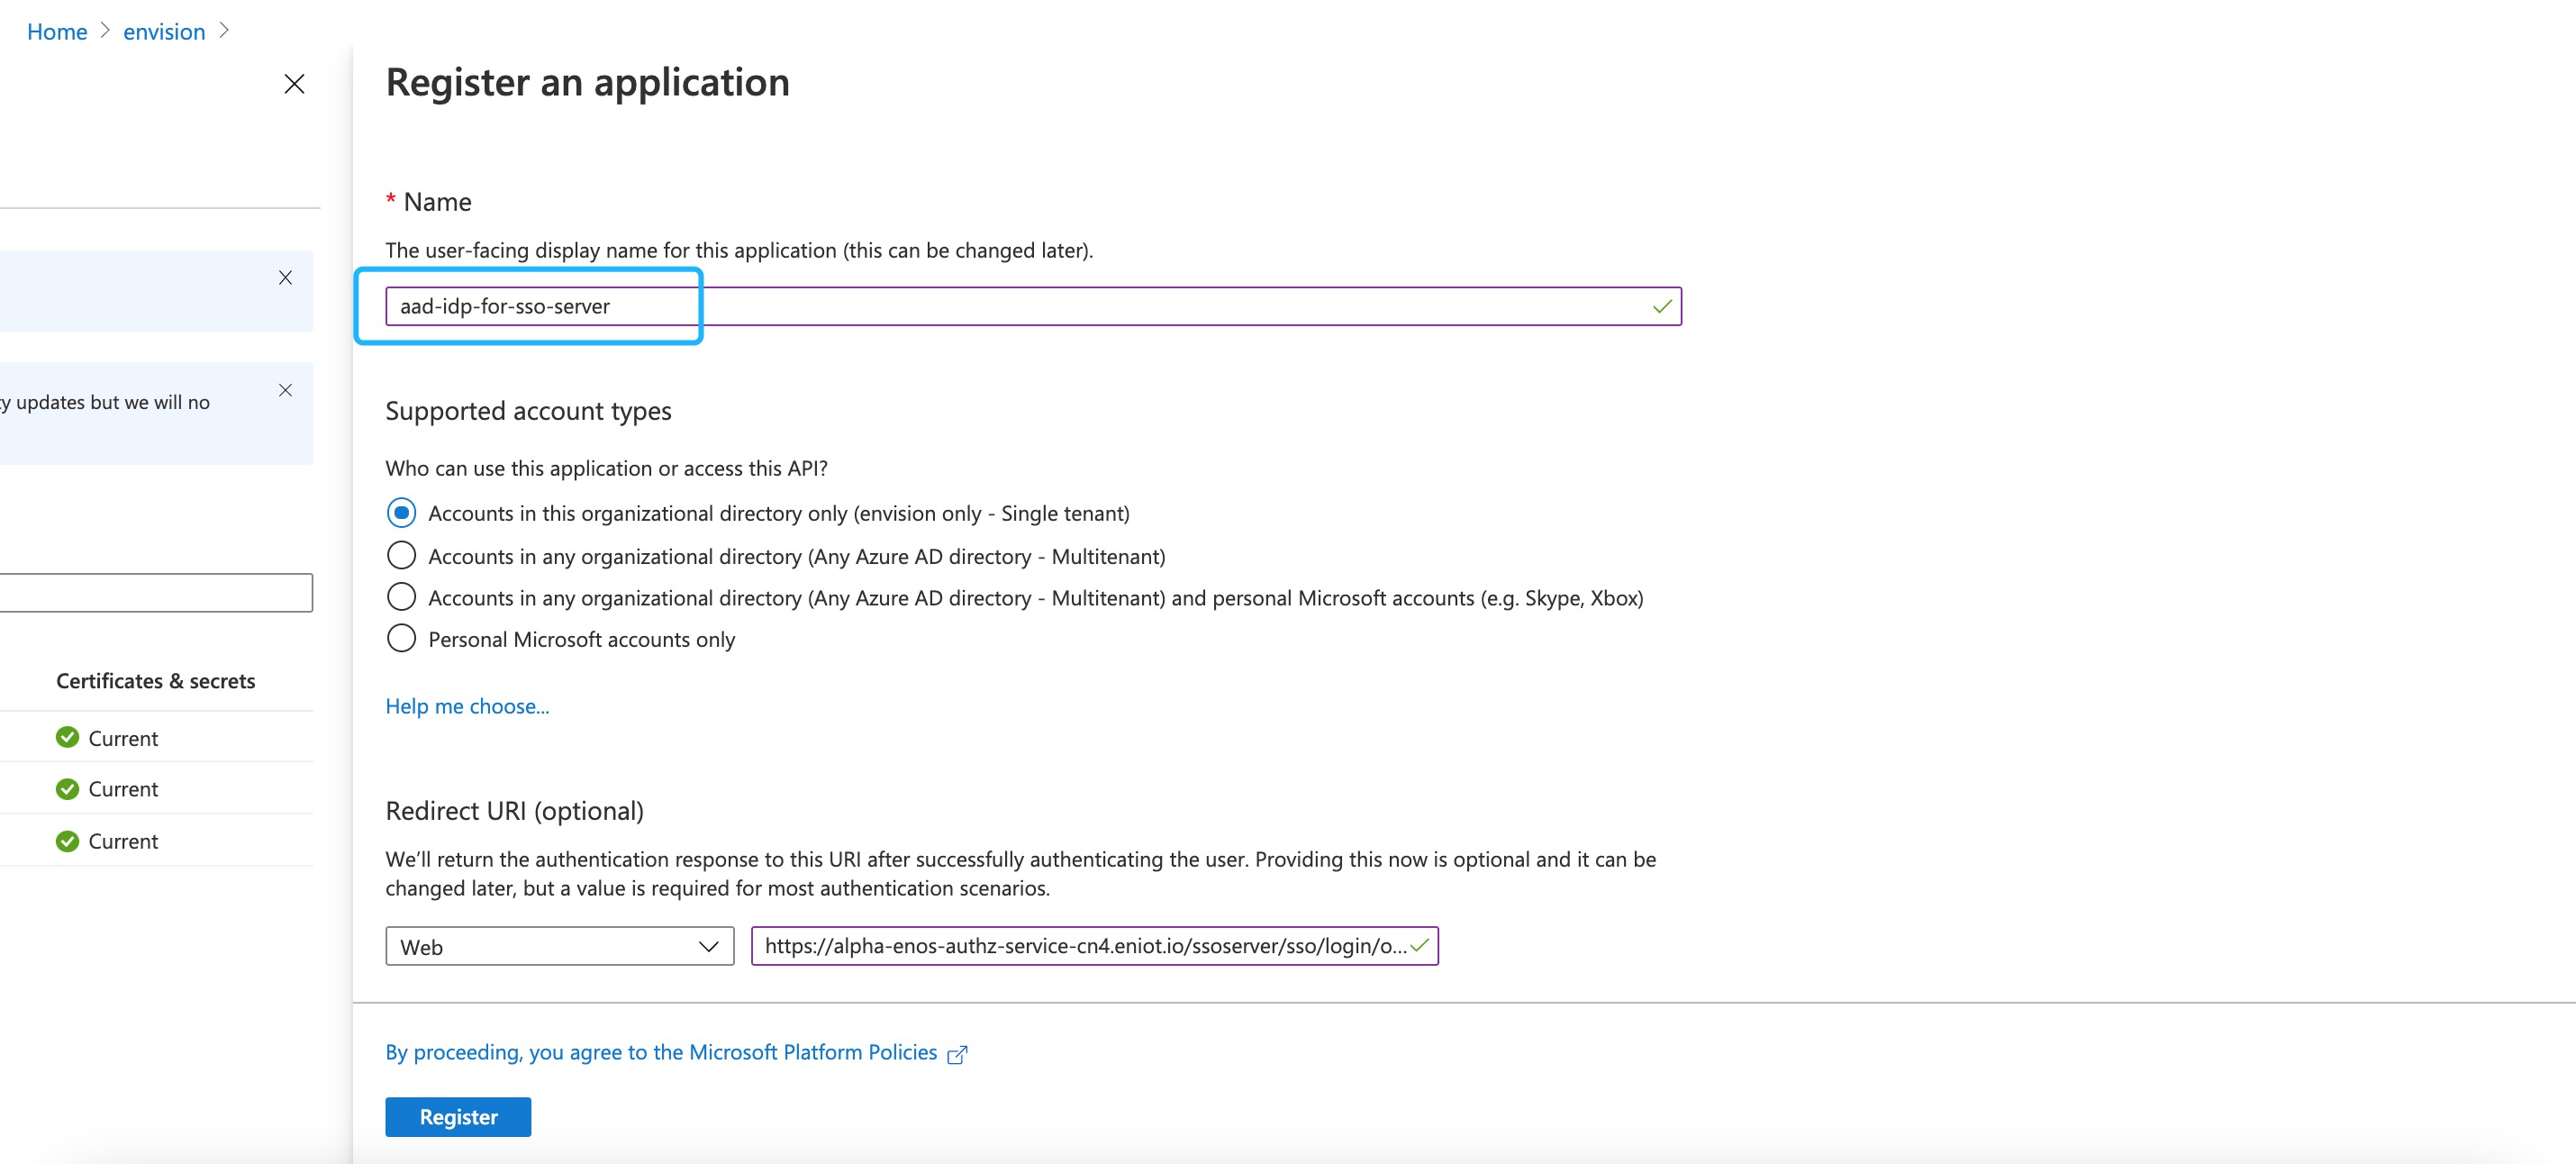
Provide the following basic registration information.
Name: aad-idp-for-sso-server
Supported account types: Accounts in this organization directory only (envision only - single tenant)
Redirect URL (optional): The address that is redirected to the application once the AAD verifies the user name and password.
- Corresponding url format: https://sso_login_environment_domain/ssoserver/sso/login/oauth2/code/aad-idp
E.g.: https://alpha-enos-authz-service-cn4.eniot.io/ssoserver/sso/login/oauth2/code/aad-idp
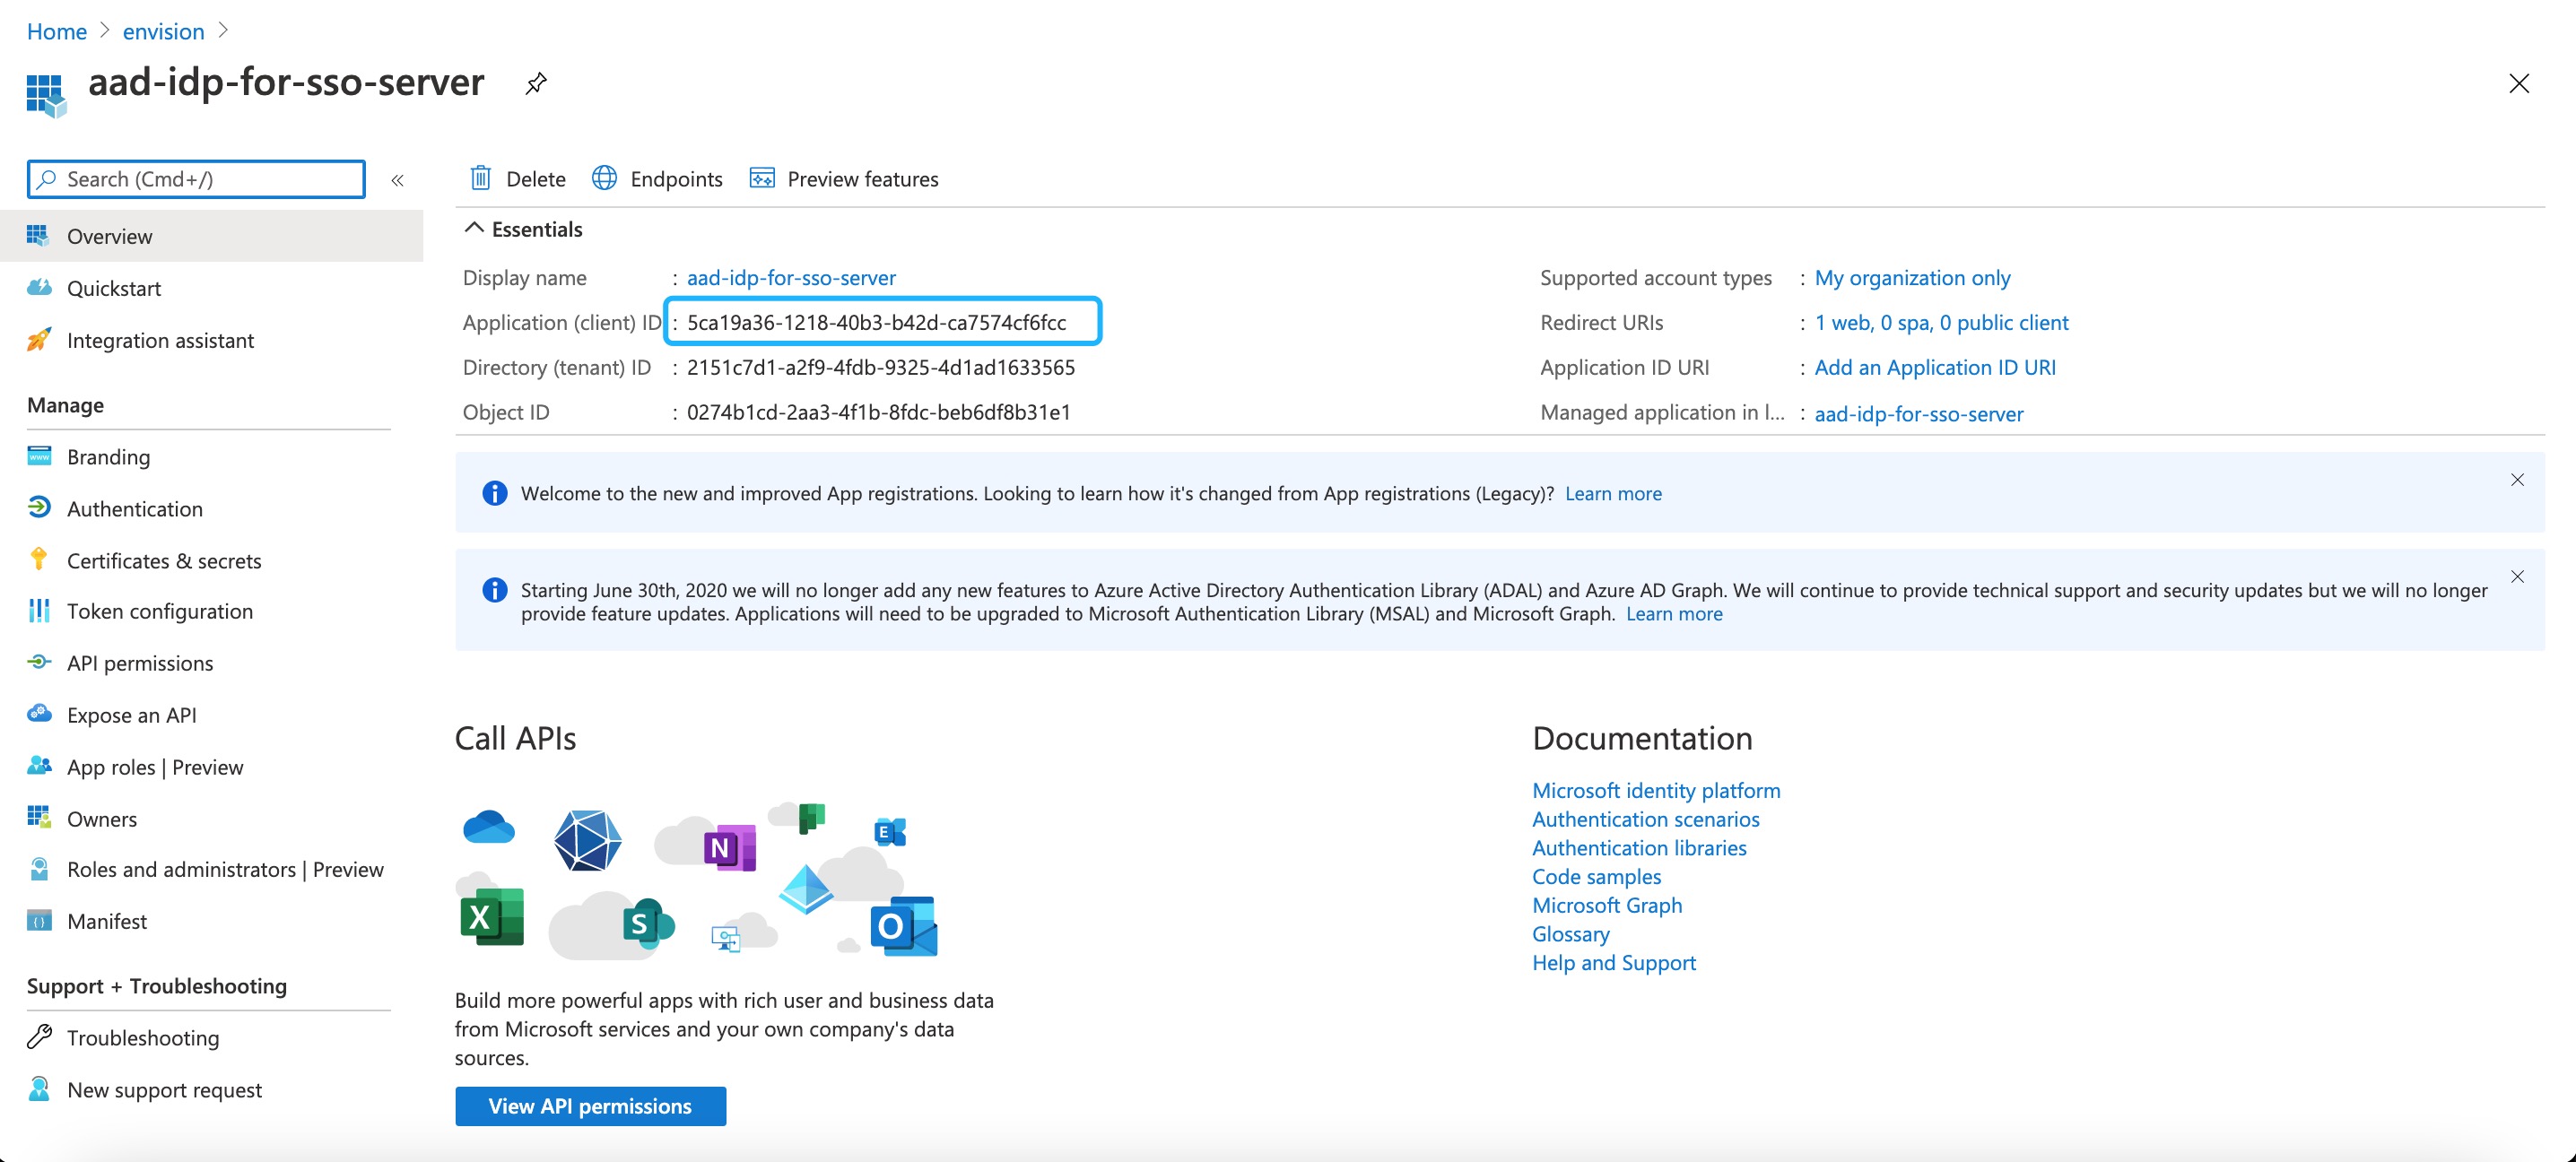
Copy the Application (client) ID and store it locally as a .txt file for future use.
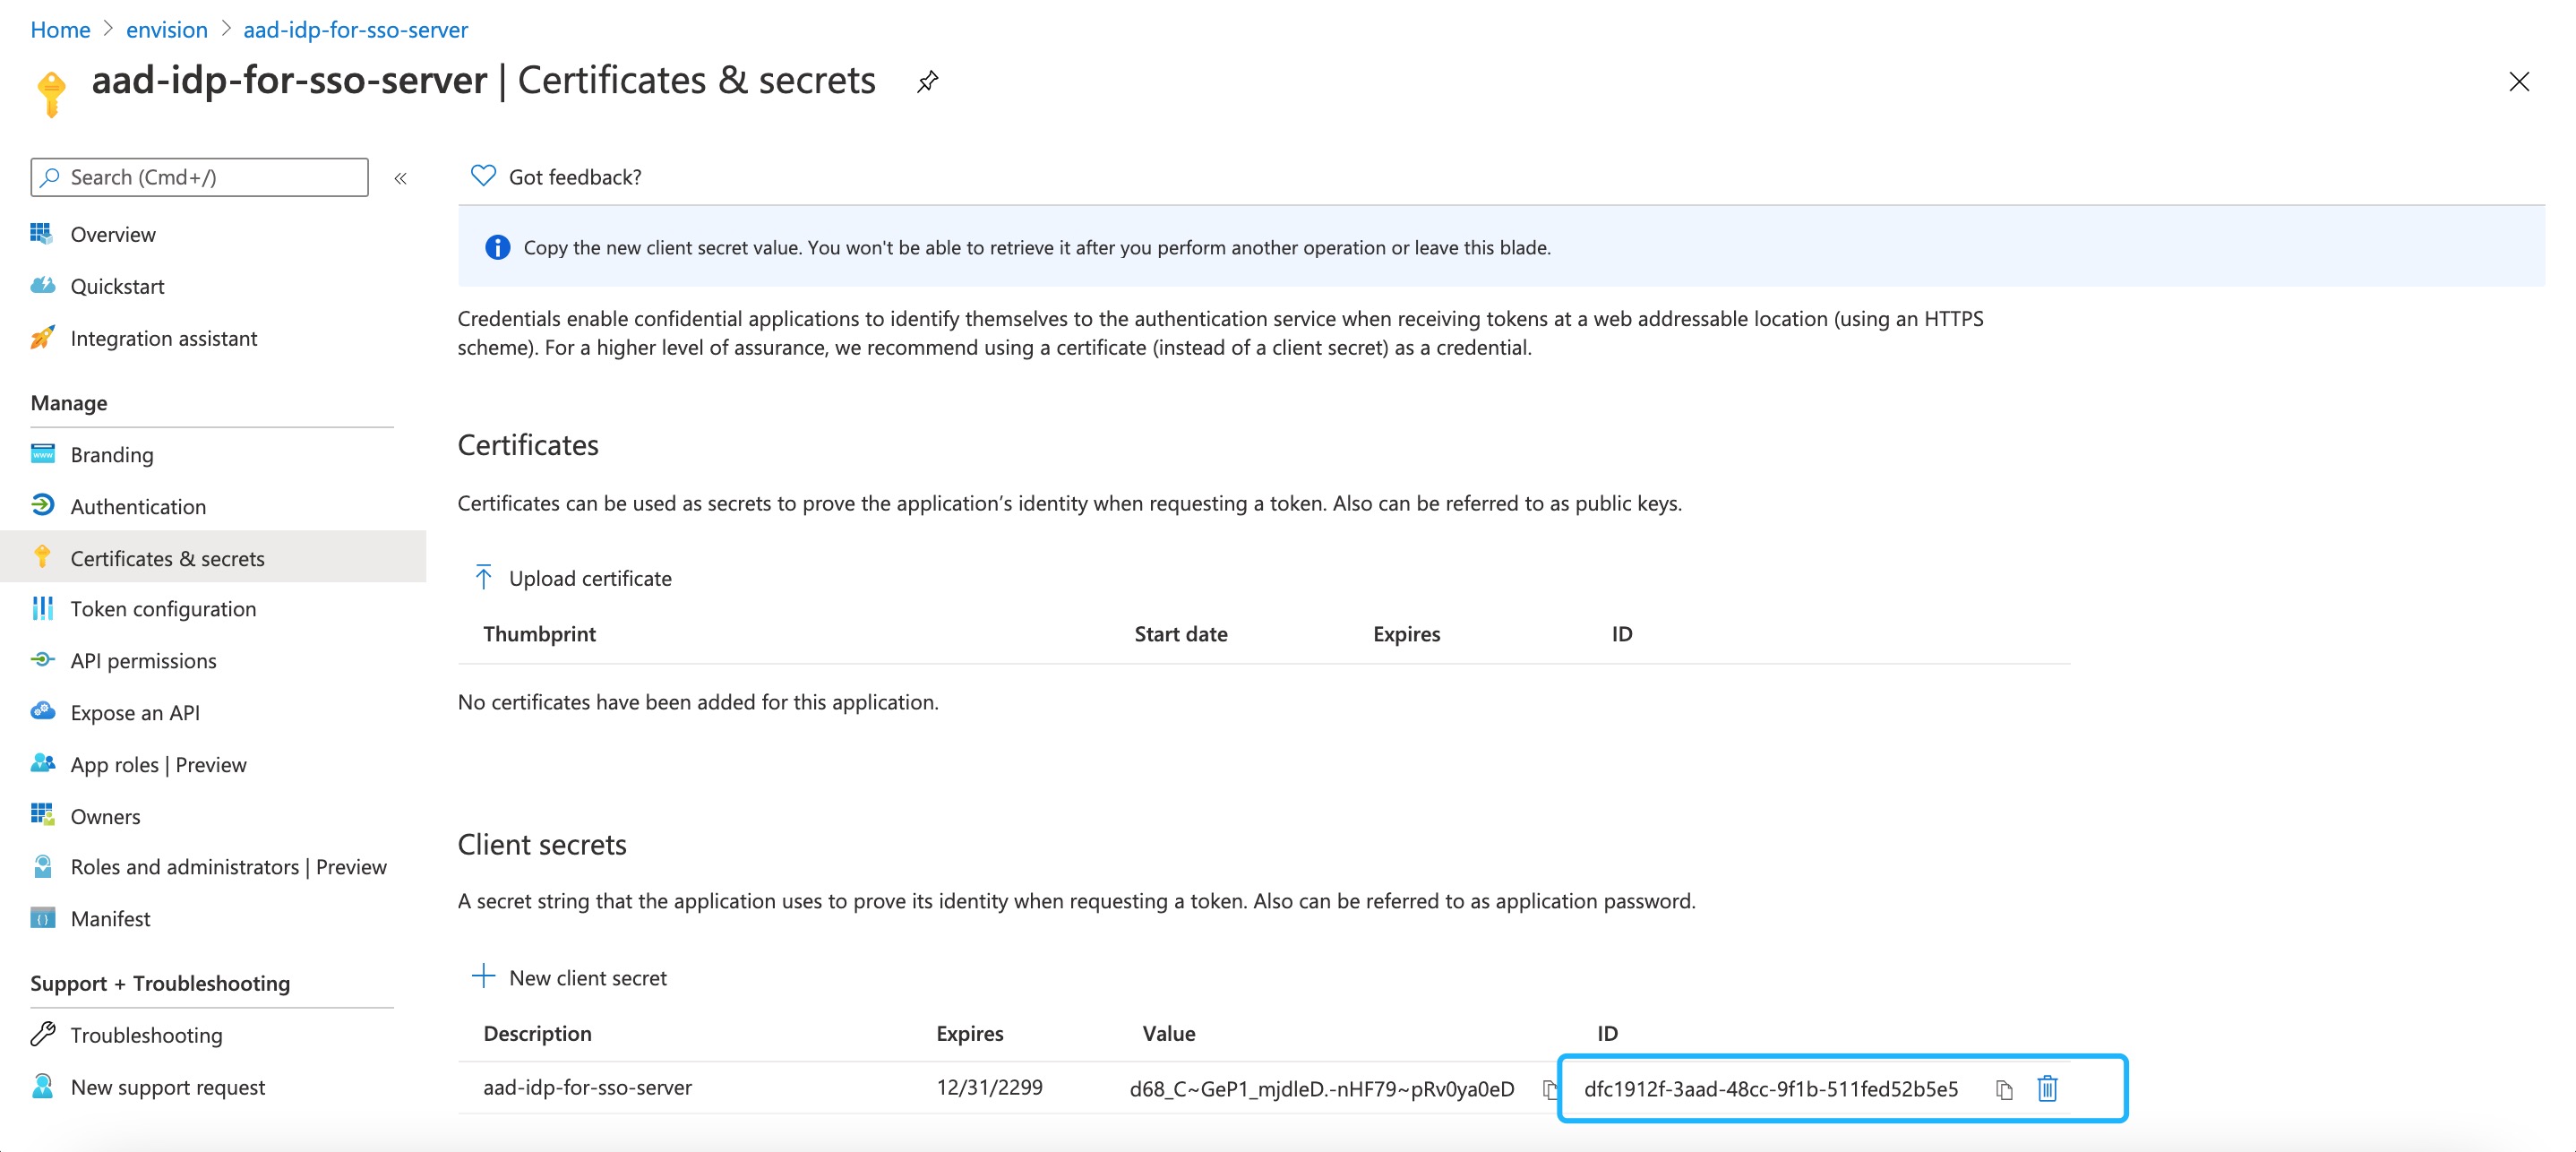
Click Certificate & secrets, and then click New client secret.
- Description: aad-idp-for-sso-server
- Deadline: Never
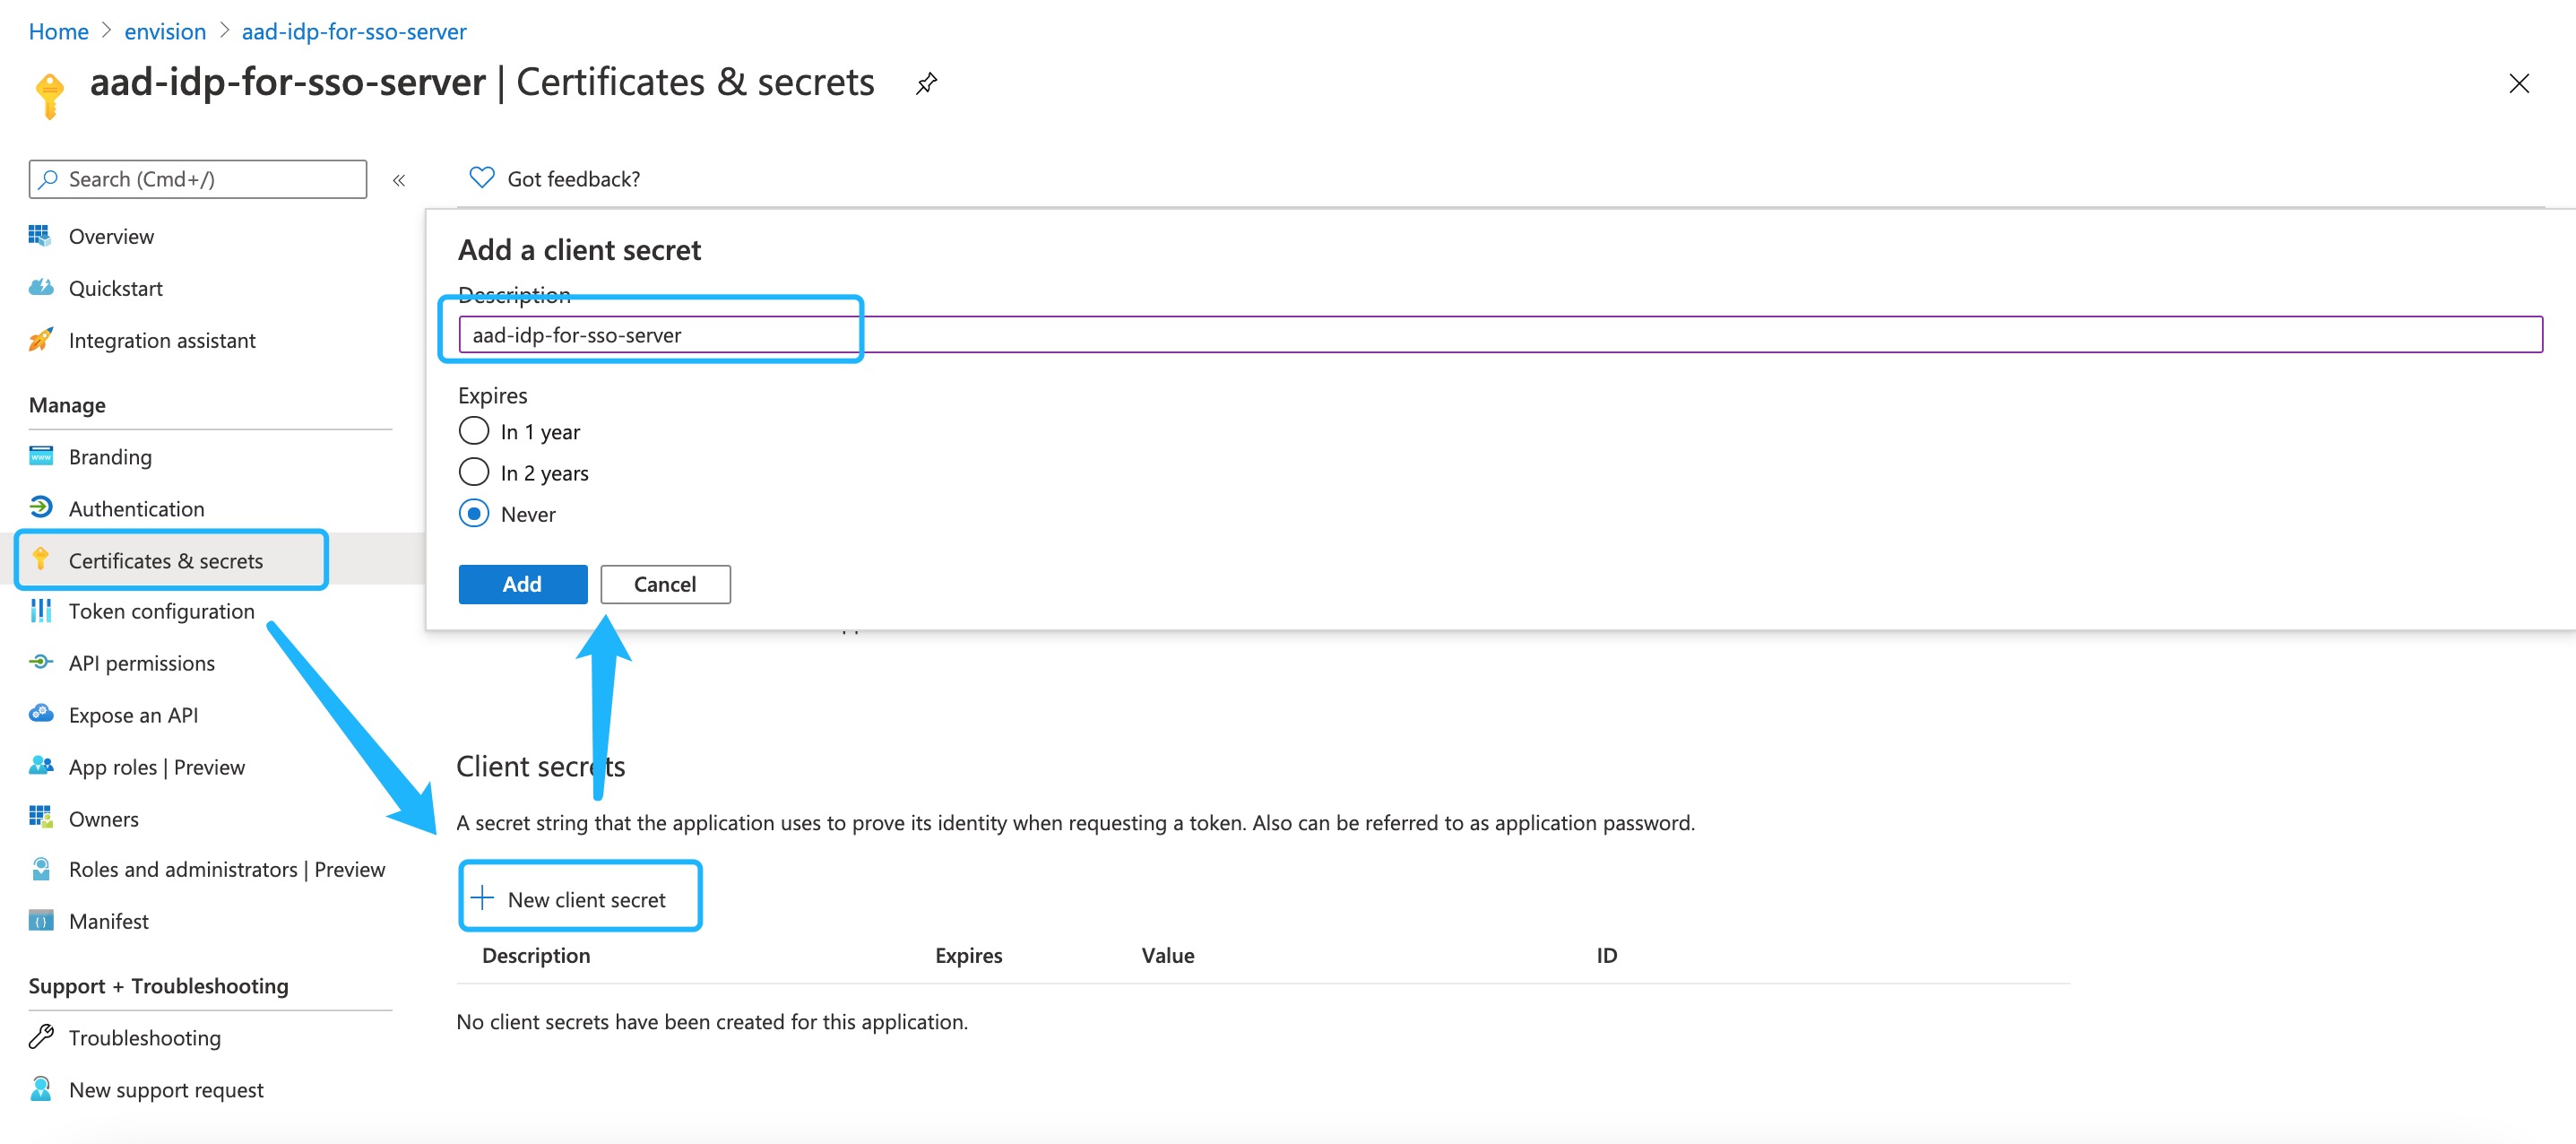
Copy the password and store it locally as a .txt file for future use.
Open Endpoint, copy OpenID Connect Metadata Document and open it in the browser, copy the issuer, and then store it locally as a .txt file for future use.

{"token_endpoint":"https://login.microsoftonline.com/2151c7d1-a2f9-4fdb-9325-4d1ad1633565/oauth2/v2.0/token","token_endpoint_auth_methods_supported":["client_secret_post","private_key_jwt","client_secret_basic"],"jwks_uri":"https://login.microsoftonline.com/2151c7d1-a2f9-4fdb-9325-4d1ad1633565/discovery/v2.0/keys","response_modes_supported":["query","fragment","form_post"],"subject_types_supported":["pairwise"],"id_token_signing_alg_values_supported":["RS256"],"response_types_supported":["code","id_token","code id_token","id_token token"],"scopes_supported":["openid","profile","email","offline_access"],"issuer":"https://login.microsoftonline.com/2151c7d1-a2f9-4fdb-9325-4d1ad1633565/v2.0","request_uri_parameter_supported":false,"userinfo_endpoint":"https://graph.microsoft.com/oidc/userinfo","authorization_endpoint":"https://login.microsoftonline.com/2151c7d1-a2f9-4fdb-9325-4d1ad1633565/oauth2/v2.0/authorize","device_authorization_endpoint":"https://login.microsoftonline.com/2151c7d1-a2f9-4fdb-9325-4d1ad1633565/oauth2/v2.0/devicecode","http_logout_supported":true,"frontchannel_logout_supported":true,"end_session_endpoint":"https://login.microsoftonline.com/2151c7d1-a2f9-4fdb-9325-4d1ad1633565/oauth2/v2.0/logout","claims_supported":["sub","iss","cloud_instance_name","cloud_instance_host_name","cloud_graph_host_name","msgraph_host","aud","exp","iat","auth_time","acr","nonce","preferred_username","name","tid","ver","at_hash","c_hash","email"],"tenant_region_scope":"AS","cloud_instance_name":"microsoftonline.com","cloud_graph_host_name":"graph.windows.net","msgraph_host":"graph.microsoft.com","rbac_url":"https://pas.windows.net"}
Step 2: Register Remote Authentication Source (With AAD as Example) on the SSO Server
In the EnOS Management Console, select Single Sign-On > Authentication Sources.
Click New Authentication Source, and fill in the following fields.
Basic Information
- Name: aad-idp
- Type: OIDC
- Enable/disable: disabled
OIDC Configuration
- Authentication URI:
- Token URI:
- User Info URI:
- User Info authentication mode: header
- Issuer URI: https://login.microsoftonline.com/2151c7d1-a2f9-4fdb-9325-4d1ad1633565/v2.0 (i.e. the Issuer address get in Step 1)
- jwkSet URI:
- Default Logout URL URI:
- Client ID: 5ca19a36-1218-40b3-b42d-ca7574cf6fcc (i.e. the client ID get in Step 1)
- Client Secret: dfc1912f-3aad-48cc-9f1b-511fed52b5e5 (i.e. the client key get in Step 1)
- Client Authorization Method: basic
- Redirect URI: The redirect URL configured in Step 1-3: https://sso_login_environment_domain/ssoserver/sso/login/oauth2/code/aad-idp
- Scope: select email and profile.
Attribute Mapping
- user name: name
- given name: name
- family name: name
- email: email
- phone:
- nike name:
Click Save to complete the creation of the new authentication source.
Precautions for Configuring the Cient for SSO Server on the Remote Authentication Source
The following should be noted if you need to configure other enterprise accounts:
- Generally, only the Issuer Url is required for the OIDC protocol, and you do not need to fill in other fields, including Authorization URI, Token URI, User Info URI, and jwkSet URI, which will be automatically completed from the issuer metadata.
- Because the OAuth2 protocol has no issuer url, the other three URIs, including Authorization URI, Token URI, and User Info URI, must be configured respectively.
- The Redirect URI is usually configured as https://{domain where ssoserver is located}/ssoserver/sso/login/oauth2/code/{idp name}.
- The attribute mapping is configured according to the user information field name returned by the remote authentication source.
Verify Login
Log in to https://dev-portal_domain/iam/api/idp/einot?destIdp=aad-idp. The address will automatically jump to the AAD login page and you will be able to log in with the AAD account.