Staging a Model Version
After completing the model registration, you can stage the first version of the model.
When staging a model version, you can build the model developed in the MI Lab or the model developed on the local machine into a model image file that can be used for hosting.
Staging a Model Version
You can stage the first version of the model by following these steps:
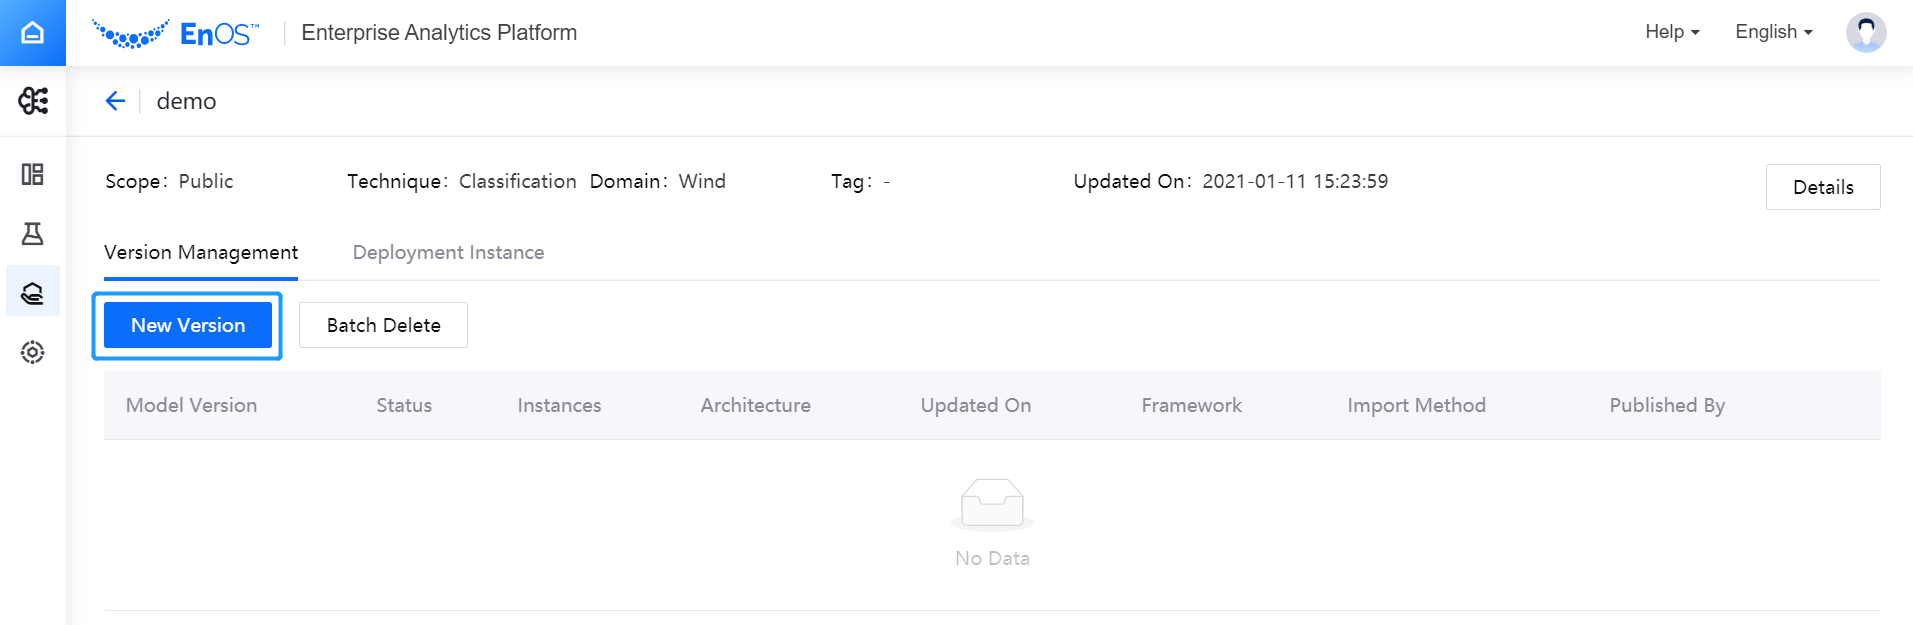
- Open the model list page, select and click a registered model to enter the Model Version Management page.
- Click New Version, and then follow the instructions to complete the version configuration, the build log, the parameter setting, and the testing of staged version in sequence.
Configuring Version Information
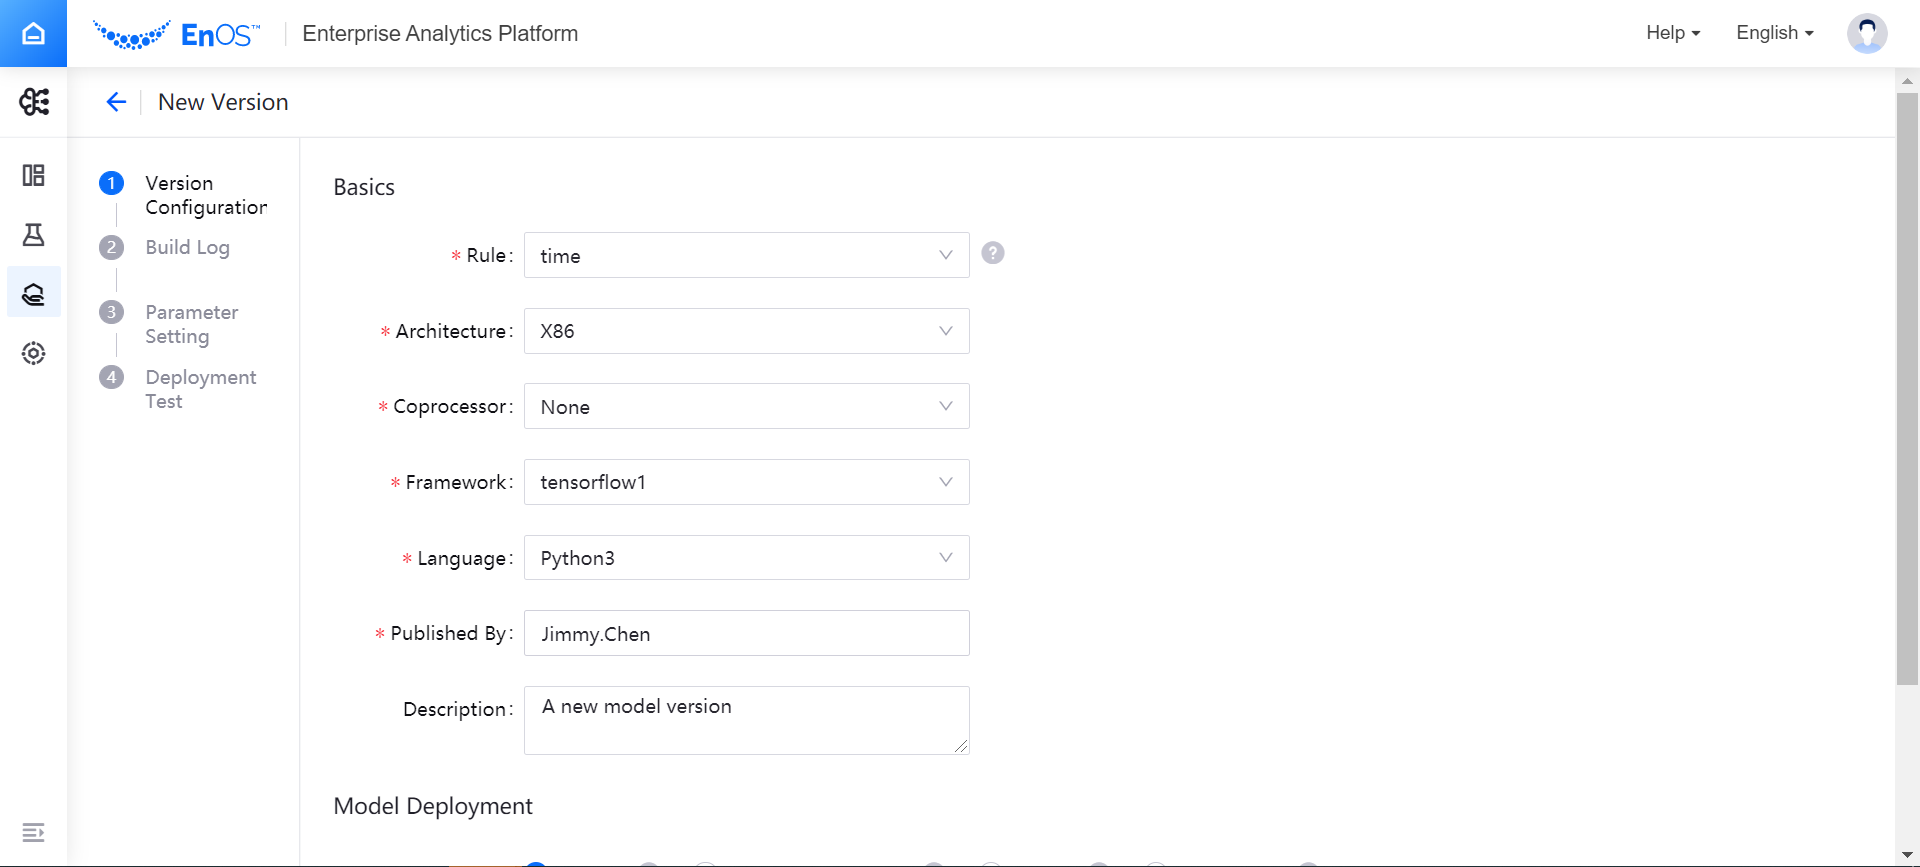
In the Basics section of the version configuration page, complete the basic information configuration of the version:
- Rule: select the naming rule of the version, which currently supports naming the version according to the system timestamp when the version is published
- Architecture: select the basic hardware to run the model version
- Coprocessor: select the coprocessor for running the model version. The computing frameworks supported by various coprocessors are given as follows:
- GPU: supports tensorflow, pytorch, h2o, spark, etc. (Note: As the current IaaS does not support GPU, the model version does not support GPU capabilities currently)
- TPU: supports tensorflow and pytorch
- VPU: supports tensorflow and pytorch
- None: default option, for which the computing architecture will keep the current logic
- Framework: select the computing framework for running the model version
- Language: select the language to be used for developing the model version (matched with the selected computing framework)
- Published By: enter the name of the user who published the model version, where the current EnOS user name is used by default
- Description: enter a brief description of the model version
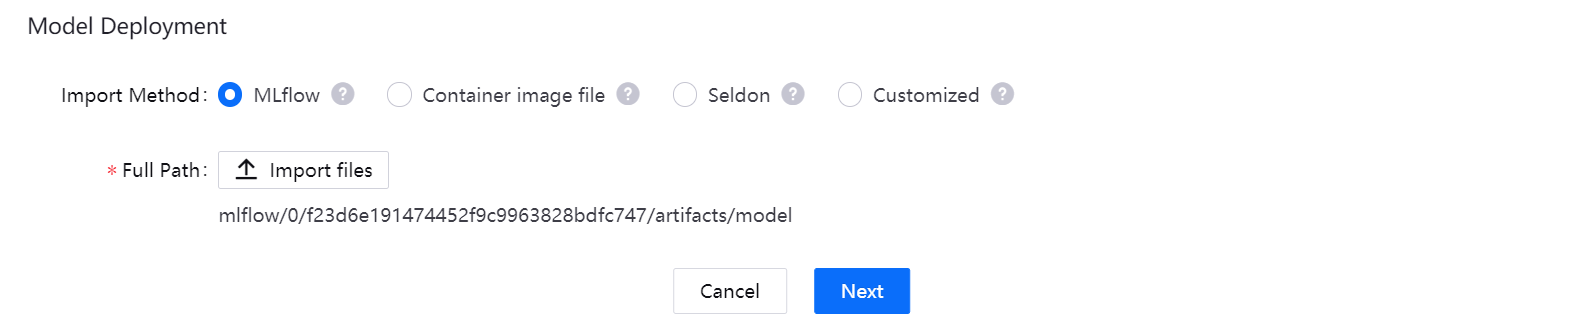
In the Model Deployment section of the version configuration page, select the method to build the model, and complete the corresponding configuration for model file uploading.
If you choose the MLflow import method, you can select the file to build the model version by following these steps:
- In the Full Path field, click Import files. The Artifacts file generated by the MI Lab training task will be displayed in the pop-up window. For more information about viewing model building files through MLflow, see Tracking Notebook Running Instances.
- After browsing and selecting the directory where the model file to be built is located (where the directory hierarchy is Project Name > Run Name > Instance Name, click Confirm.
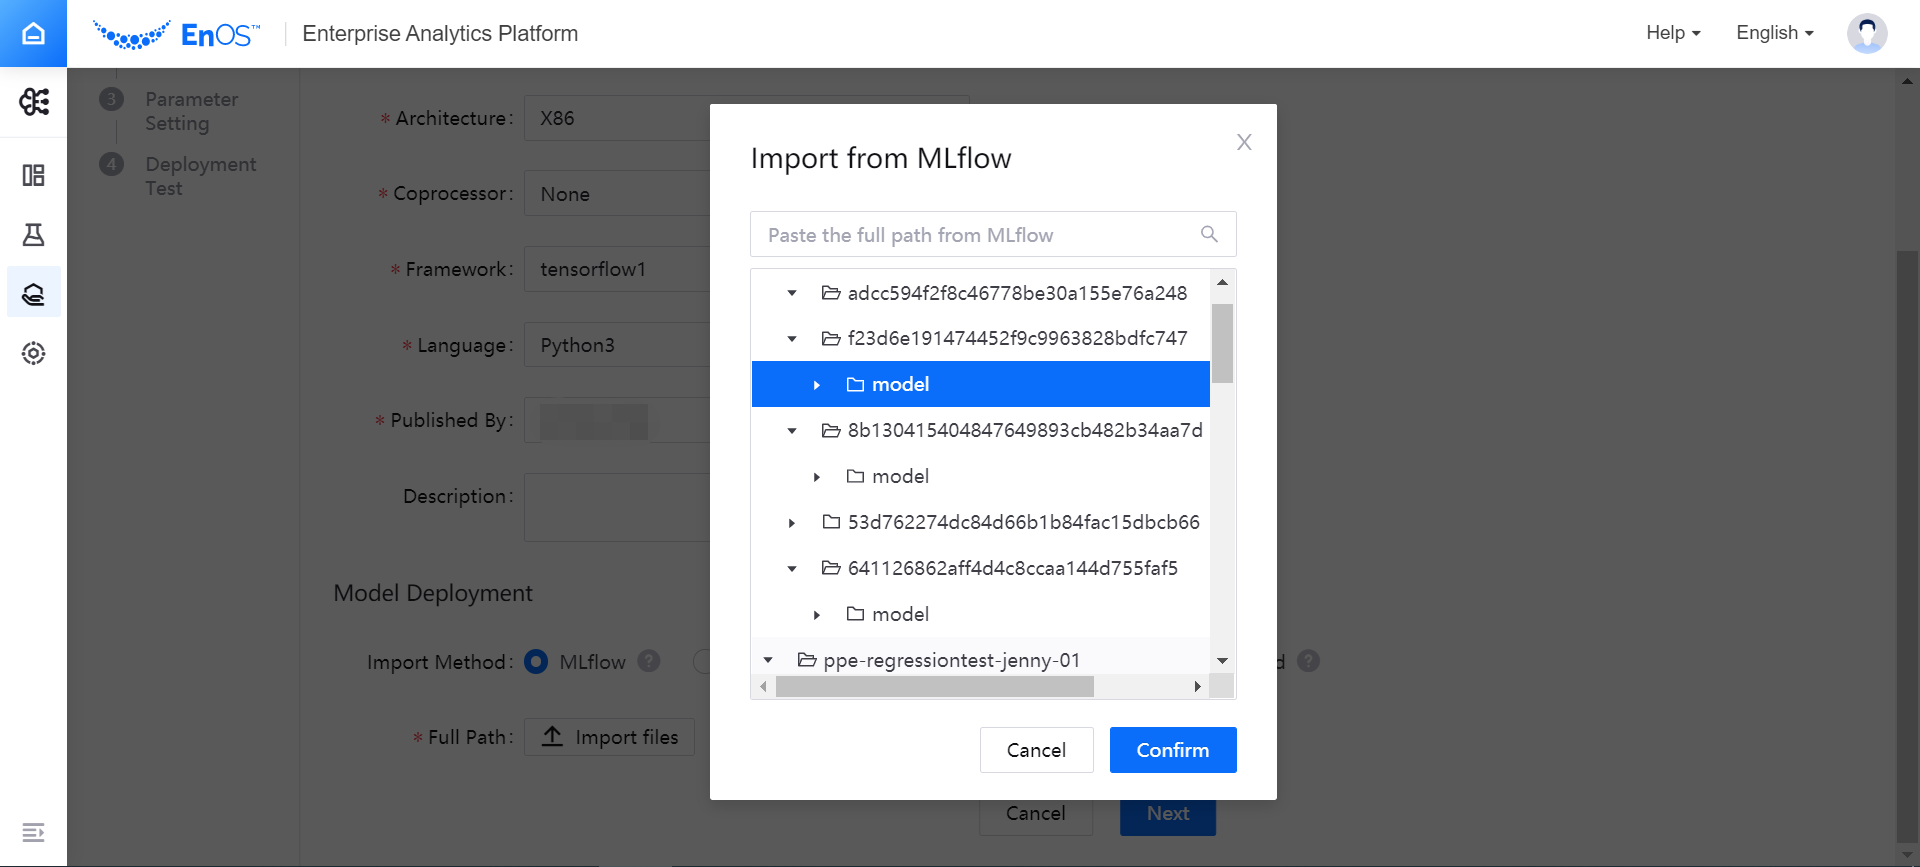
- The selected model building file directory will be displayed in the Fall Path column.
If you choose the Container image file import method, the system will automatically specify the directory where the folder is located, and you can select the target files needed to build the model from multiple hierarchical directories of Artifacts source and Git source. When deploying the model, the system will deploy the specified image as a service.
- Click Artifacts Source or Git Source to select the image file for model deployment (you can select the files alternatively on the two sources)
- In the list of selected files, view the file details and remove unnecessary files
- In the Entry point dropdown menu, select
Dockerfile.
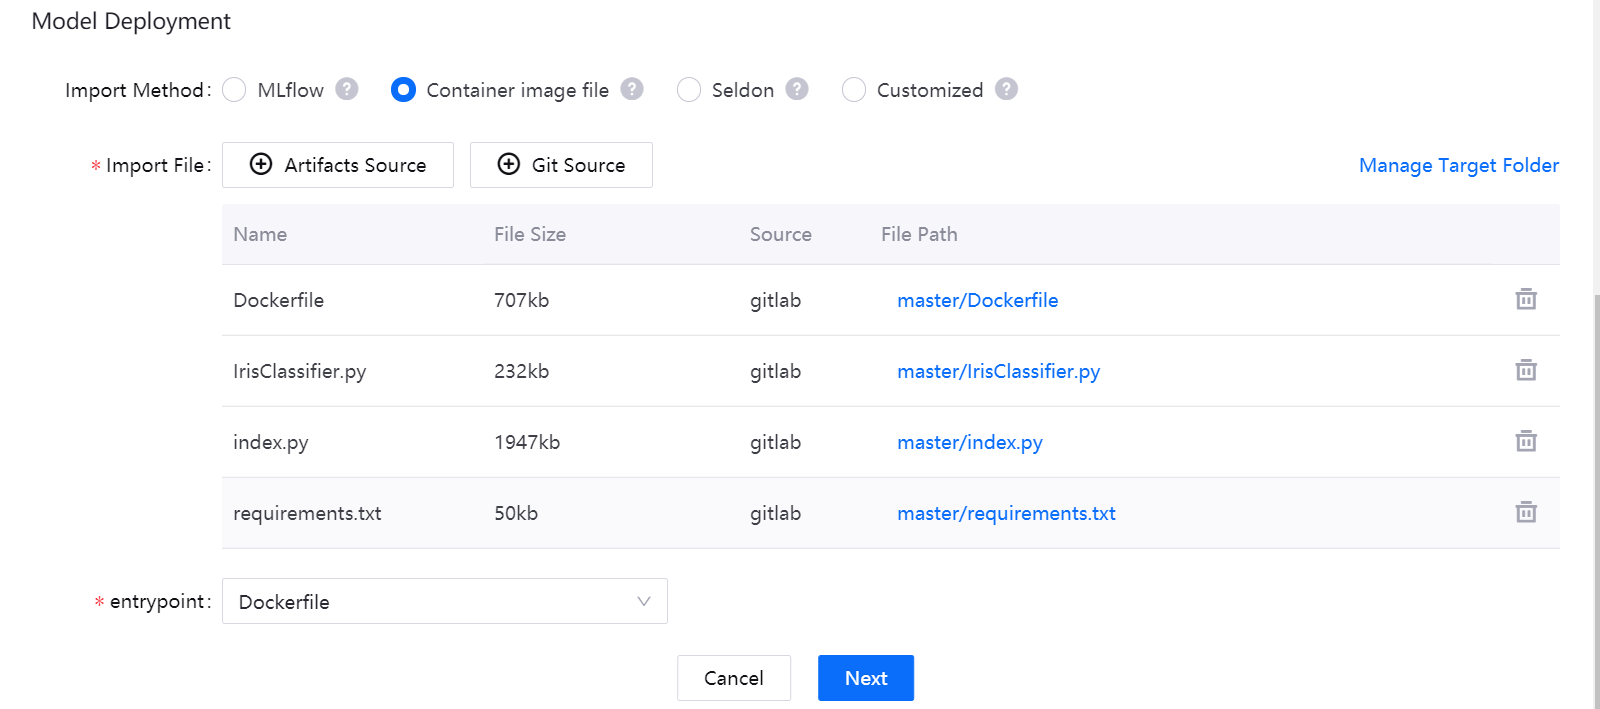
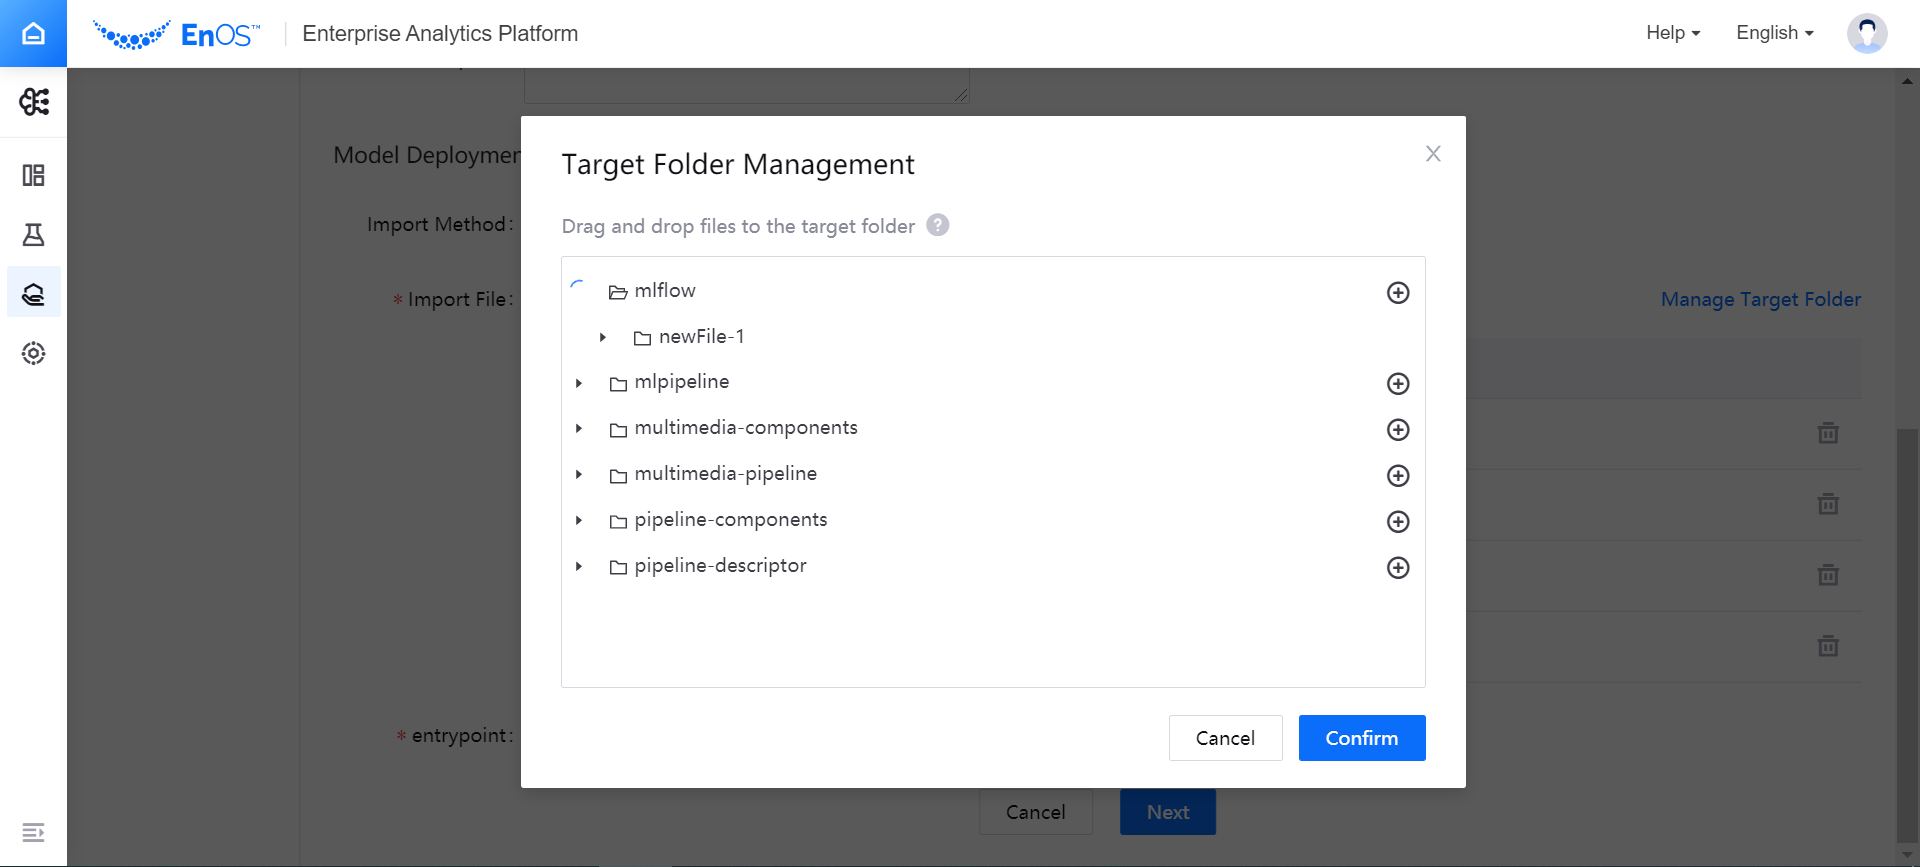
(Optional) If you need to manage the target files in the target folder when importing image files from the Artifacts source, you can click Manage Target Folder on the right side of the page and drag the target file to the specified folder in the pop-up window for managing the target folder.
If you choose the Seldon import method, you can use s2i build to create a Docker image from the source code. The system will automatically specify the directory where the folder is located, and you can select the target files needed to build the model from multiple hierarchical directories of Artifacts source and Git source. When deploying the model, the system will deploy the specified image as a service.
- Click Artifacts Source or Git Source to select the image file for model deployment (you can select the files alternatively on the two sources)
- In the list of selected files, view the file details and remove unnecessary files
- In the Entry point dropdown menu, select the entry file.

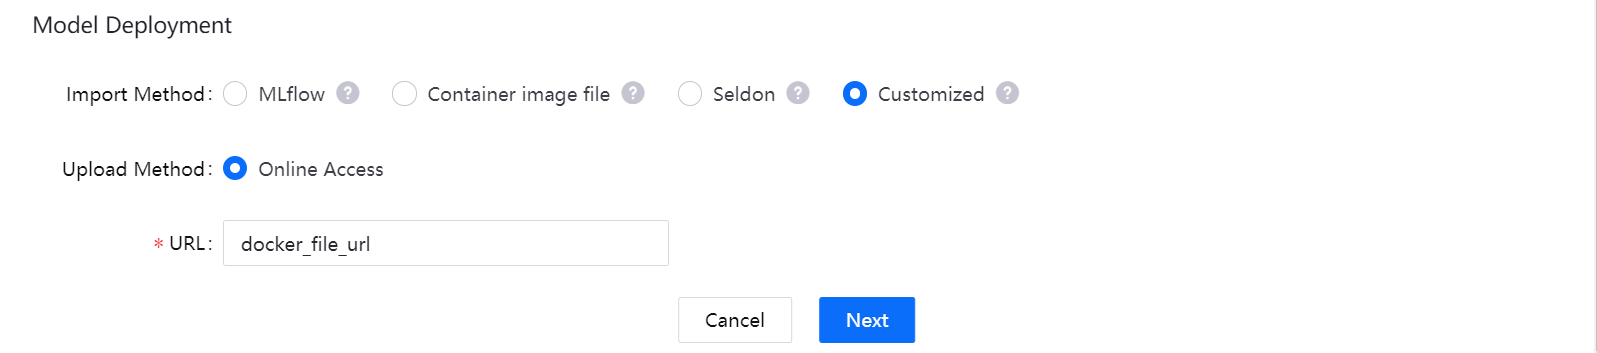
If you choose Customized import method, you can package the model into a Docker image file on the third-party custom system, and then import it.
- The system currently supports online access as the file loading method. In the URL input box, enter the address to obtain the model file.
After completing the configuration for model file uploading, click Next, and the system will automatically start the model building.
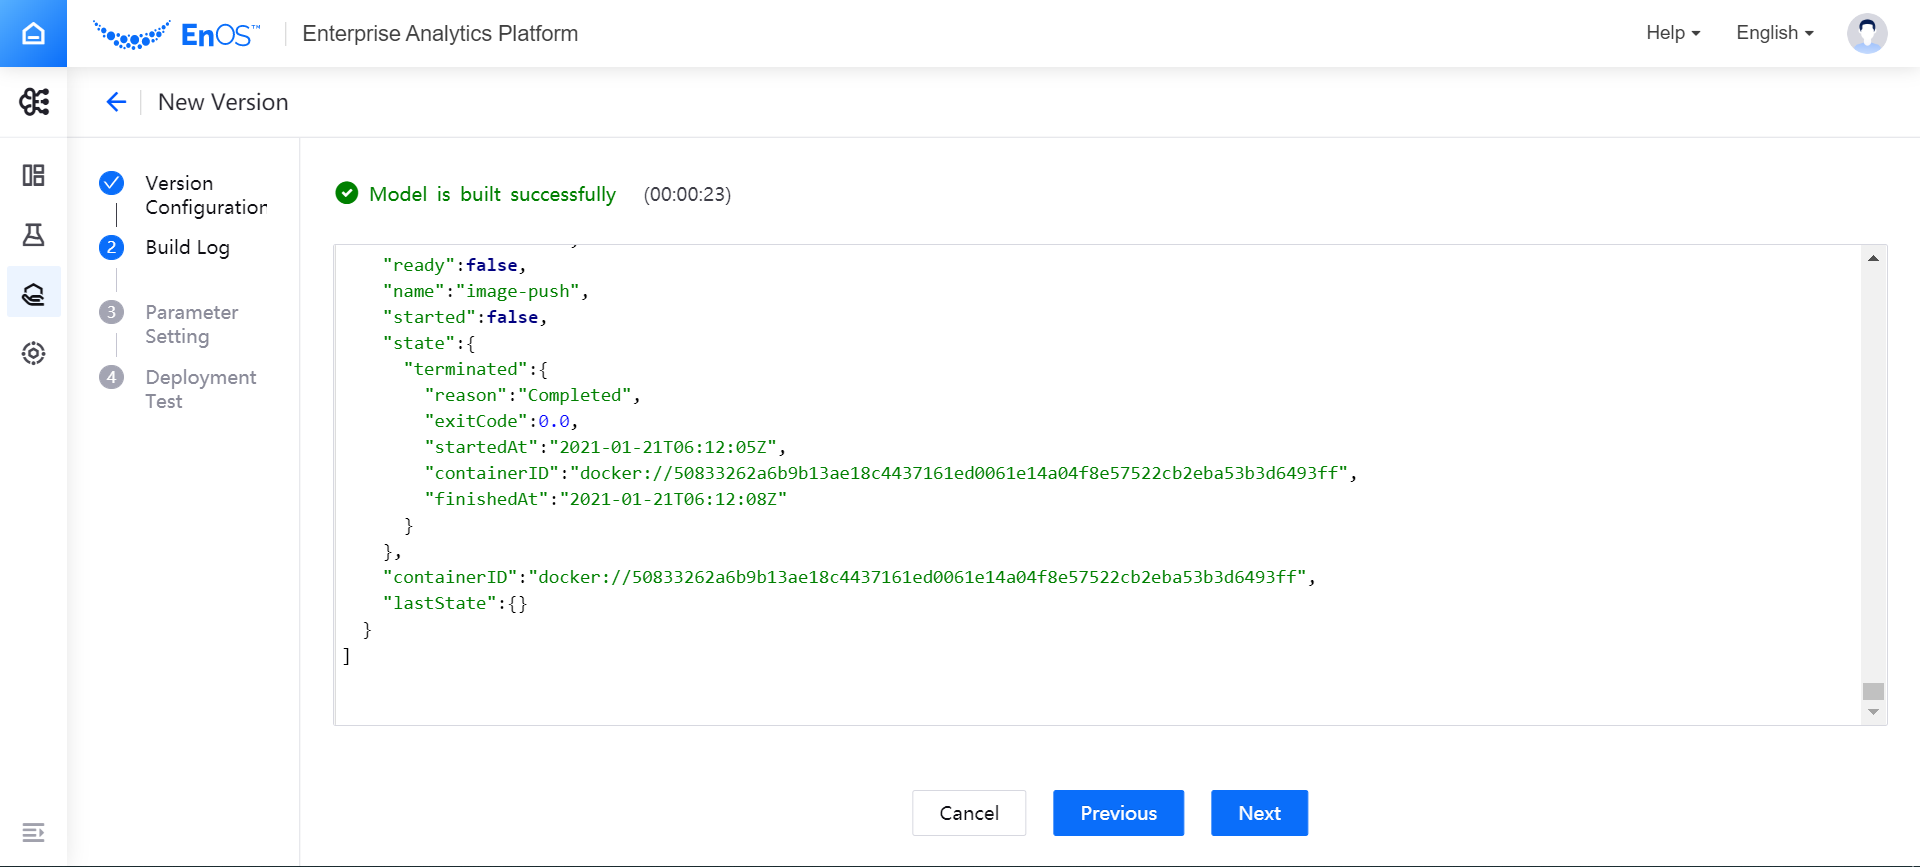
Building the Model
On the Build Log page, view the model building process. The building log will display the model building process in real time and record the time spent on building.
If the model fails to build, you can view the log to locate the cause of the failure, and click Previous to modify the configuration.
After the model is successfully built, click Next to complete the parameter setting.
Setting Model Parameters (Optional)
Through parameter settings, you can configure the customized parameters of the model.
Testing the Staged Model Version
According to the data input and output parameters set when creating a new model, write a test script to test whether the model version can work normally.
In the Input Parameter box, write a test script and click Test. Note: The size of the test JSON file automatically generated for feature parameters cannot exceed 32KB.
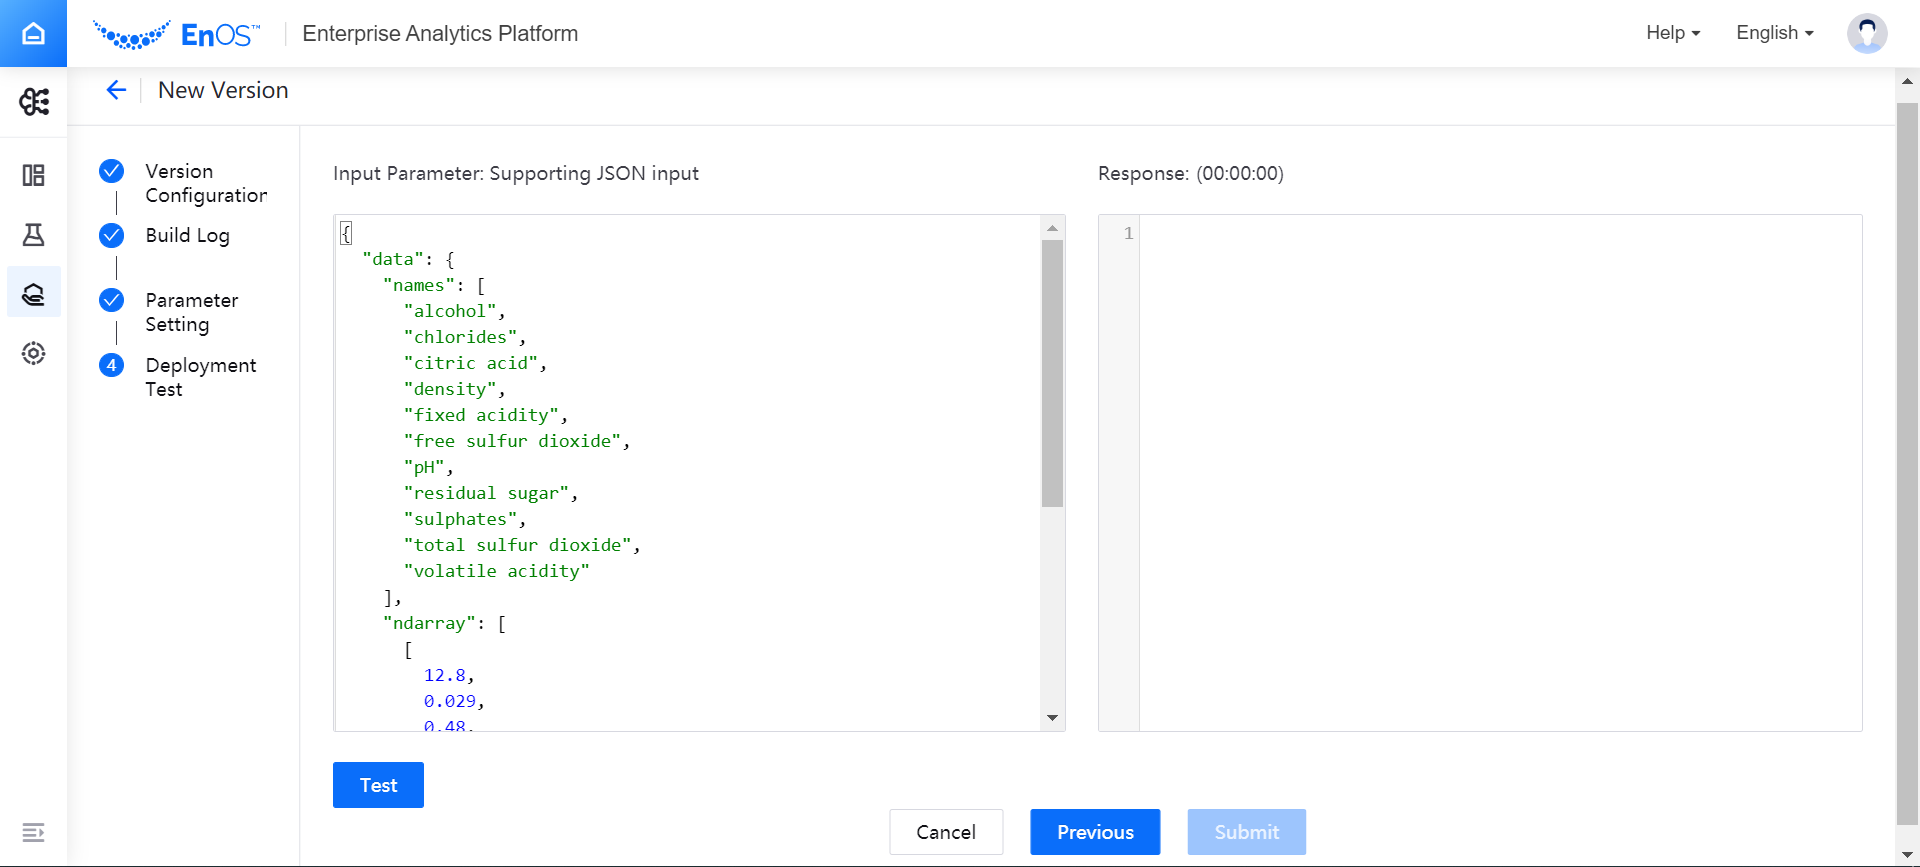
In the Response box, view the test results of the model version.

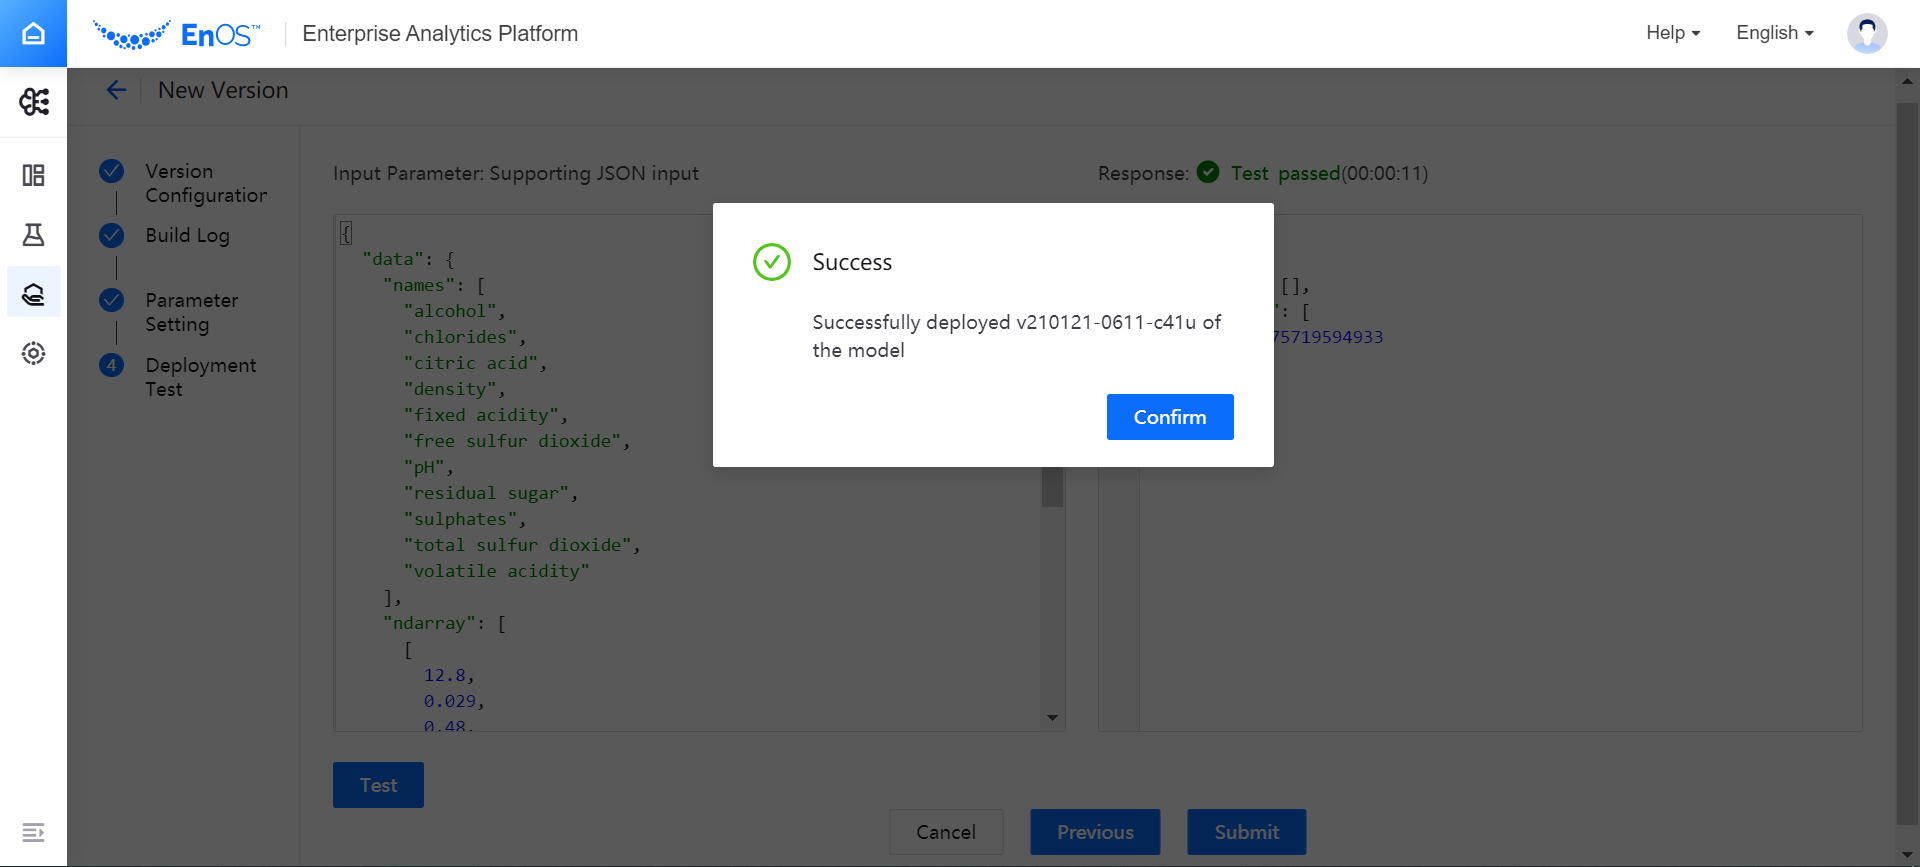
After the model version is qualified in the test, click Submit to stage the model version.
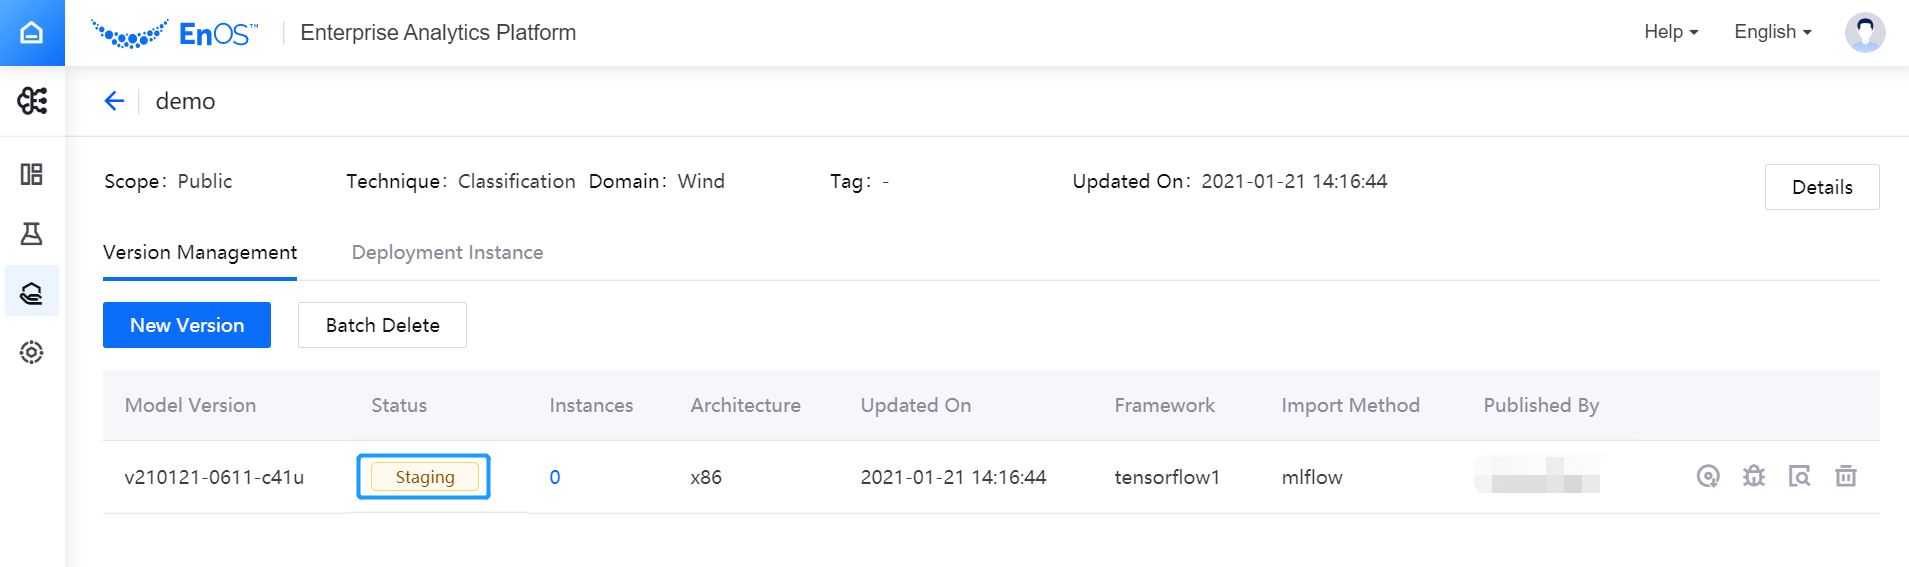
Return to the Model Version Management page, and view the staged model version under the Version Management tab. At this time, the status of the model version is Staging, and you can deploy the model version and run it online after checking it.
Exporting the Model Version Image
After the model version is staged, the EAP administrator or EAP project personnel can export the model version image for the deployment of model services on edge devices or in private environments where EAP is not installed.
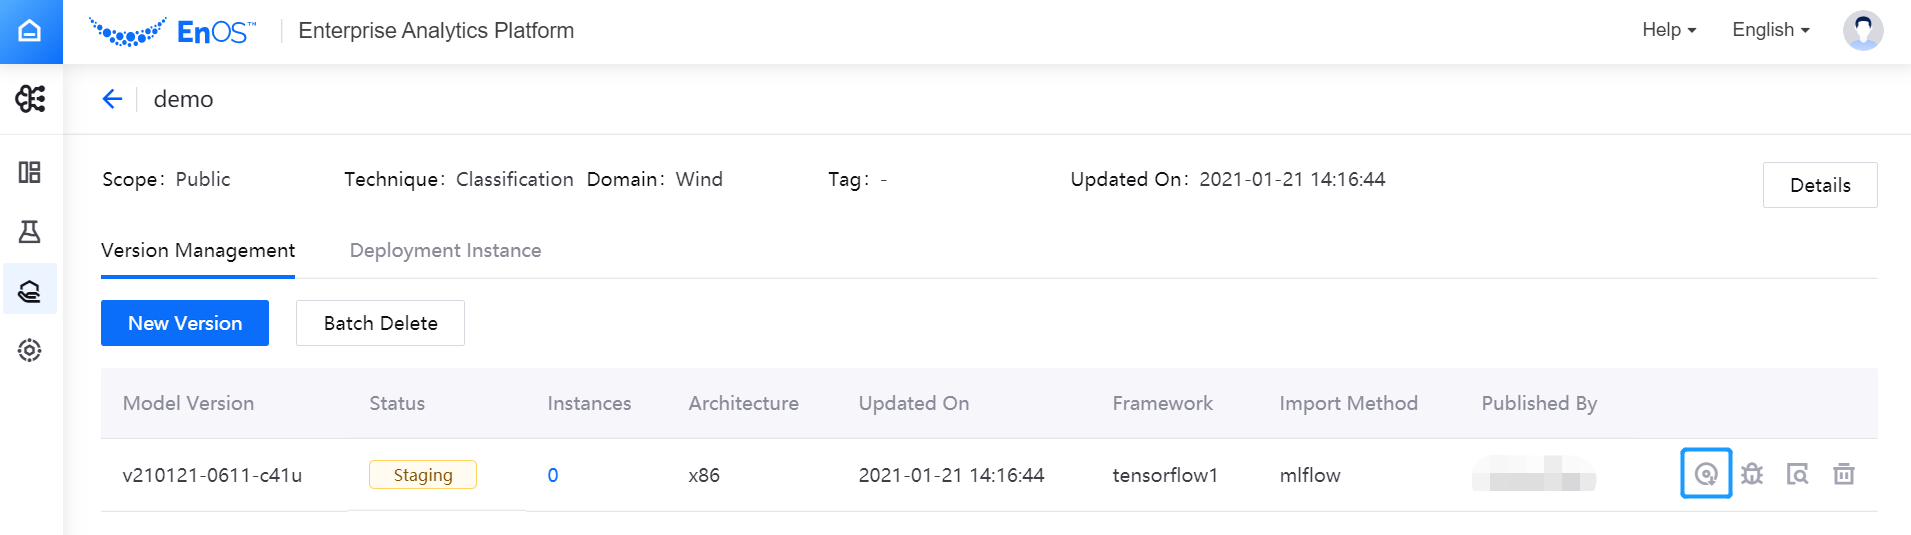
Under the Version Management tab of the Model Version Management page, view the model versions that have been staged.
Click the Image file export icon in the model version list to download the image file to a local directory.
Note
The image file to be exported cannot exceed 1GB. Otherwise, the export will fail. Any image file exceeding 1GB need to be manually exported in Harbor by the cluster administrator.
Next Step
After the model version is staged, it can be deployed online and enter the production status. For more information, see Deploying a Model Version.